
Facebook recently updated its platform. Facebook ‘Reviews‘ are now called ‘Recommendations’. Facebook confirms that they have made this change so that customers can share richer feedback about your business. This would help you be more visible in your local community and attract more customers.
Before we explain in further detail about how Facebook Recommendations work,
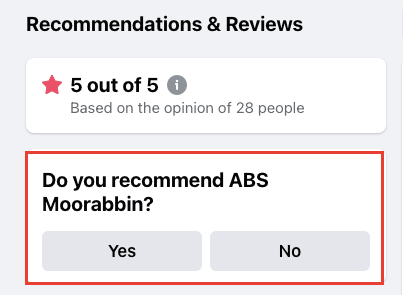
Previously, Facebook Reviews worked like most review sites. The consumer selected an option of 1 to 5 stars to express how they felt about a business based on a past interaction:
Under the new system, reviews have been replaced by Recommendations. Now, instead of leaving a rating, when a customer wants to review a business on Facebook, they can choose to “recommend” or “not recommend” a business page.
How are Recommendations different from Reviews?
Well, there are differences:
- Location – The Recommendations appear on the upper-right side,, and Reviews appear on the left-hand side (if not hidden).
- Reach – Reviews are visible to any Facebook user. With Recommendations, you can limit the reach and make it more personal.
- Format – Reviews have star ratings and comments. Recommendations have only comments.
- Reactions – Anyone can comment and like a Review, but only people in the person’s network can comment and like a Recommendation.
- Specifics – People can recommend a specific business feature (choose a tag that best describes their recommendation) and share a photo, and Reviews don’t have such an option.
So, the bottom line is:
- The tab is called “Reviews”
- The feature is called “Recommendations”
How to activate Facebook Recommendations
If you’ve already activated the Reviews tab then you don’t need to change anything. Please note that the Recommendations are a replacement of the Reviews tab and the process to activate it is the same as before.
If you still don’t have activated the Recommendations on your Facebook Page here is how to get the Facebook reviews tab:
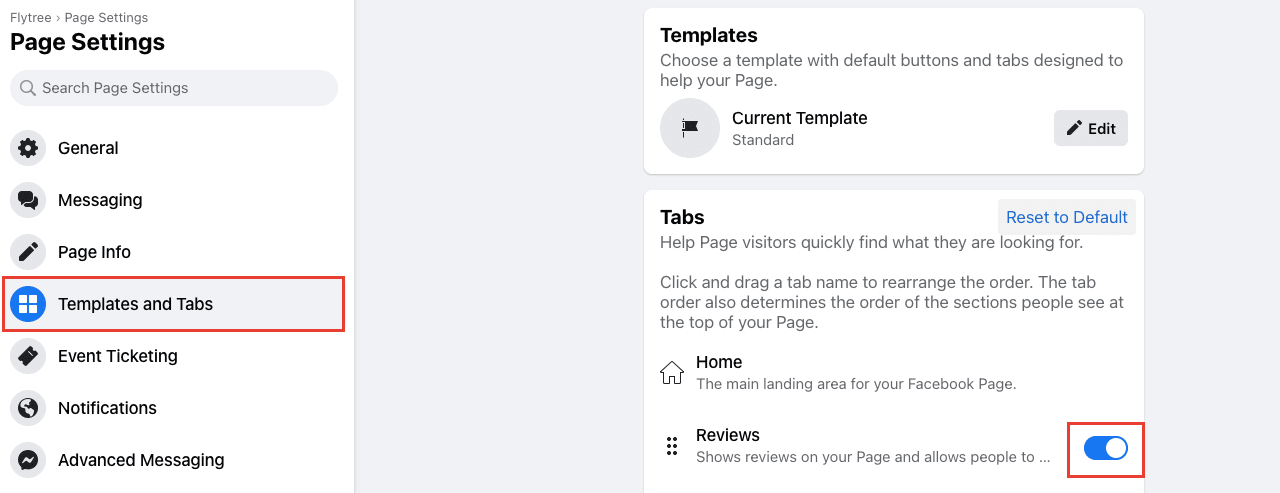
- Log in to your Facebook account and go to your business Facebook page
- Navigate to the ‘Settings’ section on your left-hand side
- Click ‘Templates and Tabs’
- Find the review tab named ‘Reviews’ in the list of tabs and activate it
Make sure your Facebook business page is set up well. Also, ensure that Facebook is part of your online reputation strategy. Request all your customers for reviews or recommendations at the end of a fulfilling transaction and see your online reputation grow. As a rule, never forget to respond to reviews and recommendations from your customers.